Sunday, May 13, 2018

Learning 1. Minikube Kubernetes Cluster Running in the Oracle VirtualBox

My learning Kubernetes Cluster is an essential skill for SRE DevOps Engineers on any Cloud platforms. My learning capability keep growing with this daily dose!! :) I like the statement given in one of the author -Kubernetes is like captain of ship where multiple container clusters carried in the huge ship. This is a first step that will help you to enter into world of Kubernetes cluster technologies. Kubernetes is also known as k8s, this is quite young technology in the DevOps stack. Here we have two options to work-out on Learning Kubernetes:
  1. Kubernetes installing in master-slave in multiple nodes
  2. Minikube running a locally single node
The first option will be used in real-time production environments, and the other is used for learning purposes. Here I've selected the second option for running WebLogic on Minikube.


Benefits of Kubernetes cluster

There are many benefits but in brief for WebLogic  

  • Kubernetes is the core component in Cloud Native Engineering platforms
  • It Will be extensively used in aws, azur and BMC (Spartacus)
  • Ready to plug in real time web applications for easy deploy and scale
Running WebLogic server on Minikube Kubernetes cluster

In this article, I will be discussing 
  1. How to prepare the VirtualBox for Minikube?
  2. Installation of Docker CE in Ubuntu
  3. Installation of Minikube in Ubuntu
  4. Deploy the minikube kubernetes dashboard
  5. Running WebLogic container in a pod

Prerequisites for Minikube in Ubuntu Virtual Box               

Install the VirtualBox if it was not latest and try to launch the new Ubuntu virtual disk image. I preferred to use Ubuntu 16.04 Xenial or Ubuntu 17.10 Artful are best suites for this experiment. Select the virtual disk from  uncompressed folder. Assigned the 4Gig Ram and 2 CPUs to the VirtualBox. Start the Ubuntu 16.04 VirtualBox image, after login osboxes user. Install the Guest Additions then try to configure shared folder where you wish to store the software that shares between host machine with a guest machine. Enable the shared clipboard -> bidirectional, and also drag and drop -> bidirectional.

1. Enter into a terminal use sudo -i to switch to the root user, update the apt package index with:

 apt-get update 

2. Install packages to allow apt to use a repository over HTTPS:
 
apt-get install \
                                apt-transport-https \
                                ca-certificates \
                                curl \
                                software-properties-common

3. Add Docker’s official GPG key:
 
curl -fsSL https://download.docker.com/linux/ubuntu/gpg | sudo apt-key add - 

4. Verify that you now have the key with the fingerprint 9DC8 5822 9FC7 DD38 854A E2D8 8D81 803C 0EBF CD88, by searching for the last 8 characters of the fingerprint.

 apt-key fingerprint 0EBFCD88
docker fingerprint validation in Ubuntu

Use the following command to set up the stable repository. You always need the stable repository, even if you want to install builds from the edge or test repositories as well. To add the edge or test repository, add the word edge or test (or both) after the word stable in the commands below. 5. Adding repositories for the latest stable version

 add-apt-repository \
"deb [arch=amd64] https://download.docker.com/linux/ubuntu $(lsb_release -cs) \
stable"

Note: Starting with Docker 17.06, stable releases are also pushed to the edge and test repositories. 6. Update the apt package index.

 apt-get update

7.Install the latest version of Docker CE, or go to the next step to install a specific version:

 apt-get install docker-ce 

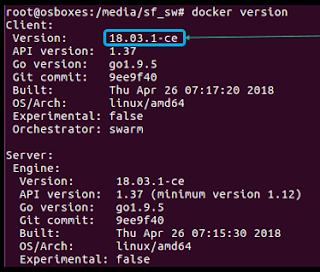
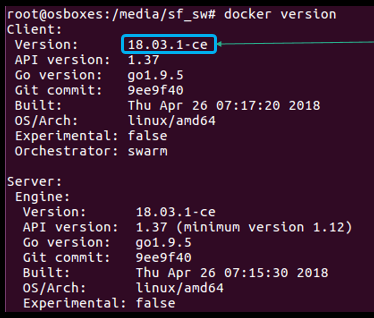
8. login through root check below command if running or not:
                docker version
                docker info                
 

Install minikube 

Minikube is recommended for development environments or to experience the Kubernetes in a quick way in a local VM/Laptop. Docker swarm is also a similar orchestration tool as Kubernetes. Kubernetes is open-source. Kubernetes is also supports non-docker containers such as rocket containers.

1. Firstly, download minukube and kubectl

curl -Lo minikube https://storage.googleapis.com/minikube/releases/latest/minikube-linux-amd64 && chmod +x minikube && sudo mv minikube /usr/local/bin/

Now kubectl download and move to /usr/local/bin
curl -Lo kubectl https://storage.googleapis.com/kubernetes-release/release/$(curl -s https://storage.googleapis.com/kubernetes-release/release/stable.txt)/bin/linux/amd64/kubectl && chmod +x kubectl && cp kubectl /usr/local/bin 

2. Set the MINIKUBE Env Variables
                export MINIKUBE_WANTUPDATENOTIFICATION=false
                export MINIKUBE_WANTREPORTERRORPROMPT=false
                export MINIKUBE_HOME=$HOME
                export CHANGE_MINIKUBE_NONE_USER=true
                mkdir $HOME/.kube || true
                touch $HOME/.kube/config
                export KUBECONFIG=$HOME/.kube/config

3. Lets start the Minikube with the none driver there are multiple drivers available. Each driver works according the platform where your host machine running. So using for this experiment vm-driver=none is best suitable because it is a Virtualization of Containerization.

minikube start --vm-driver=none

We can use kubectl commands which are able to interact with Minikube cluster. If you get any issue related to certs. The fix will be simply stop the minikube and start it.

Understanding kubernetes Head Node


 Minikube internally runs Kubernetes Head node or some other says that Master node, the whole control will be operated from this node only, which contains all components:

  1. etcd
  2. scheduler
  3. controller
  4. apiserver
  5. addons-manager
All the component required for Head node we can see in the namespace list:
kubectl get po --all-namespaces

Head node work with the set of namespaces

Kubelet is a Kubernetes Node agent which will be always running and monitoring all the components. If anything goes down it will brings up that component service automatically.

The etcd is capable to store the key, values which are used in the Kubernetes cluster. It is developed and inspired from coreos.

Every Kubernetes master will have scheduler, that is actually used to triggered as per the start time value, by default it will be 0.

Kuberneretes master have controller which internally talks to docker environment and a kubelet. Kubelet is like running an agent for Kubernetes master.The internal communication will be using RSA certs.

The apiserver in the master will be serving the client requests and they will be routed to the available Nodes. A Node may have multiple pods of same category.

Think Differently

Using minikube dashboard to deploy WebLogic Console application where many thousands of examples are there to tell hello-world app but say think differently web application that is WebLogic administration console as app to deploy as service and name it as wls-app.

Minikube Kubernetes will be providing us a nice UI dashboard to show the workload on the cluster. What all the status of pods, services, and also allows use to create and manage the deployments etc.

Let's start the dashboard

minikube dashboard

when you run the above command it will try to launch the browser and start the dashboard
Minikube dashboard

Finally stopping the minikube
minikube stop
Stopping local Kubernetes cluster...
Machine stopped.

Next post 


Learning 2: MiniKube Kubernetes Cluster WebLogic Application deployment

Hoping you like this experiment trick. please share this with your techie friends, share your comments.

Saturday, May 5, 2018

3. Learning How to build Best Docker images?

The containerization concept was available since the 1978s in the UNIX. but the real usage and evaluation started from the year 2014 onward, a small community of docker open-source organizations started to focus on it and developing it.

In the last post, we had the unofficial image then it went up the size up to 3.8 GB. But same logic if we try on Oracle Linux 7-Slim version image it reduced 1 GB!!!

  Use Layered approach for Oracle images  

Most of the developers question how do we deliver it to end-user when you create the containers for WebLogic. The best practice to use the layered approach for WebLogic applications. We have demonstrated with the following layer approach the whole stack is going to break down into two major parts:

  1. Read-only 
  2. Read-write 
The latest image is on top which is only allows you to modify the content. where application jar/war/ear file will be deployed.
The bottom stack will be re-used by multiple developers to build their container and work with no-time spending that's the beauty of this containerization technology.


Please refer to the Oracle White paper.
WebLogic docker image layers


Recently we had a requirement to develop the containers of Oracle SOA. if we take the old stack it is not flexible enough to support the requirements. Always prefer to use the latest installers, Oracle SOA 12c is flexible for supporting Containerization.

Use the yum -y clean

When you install any of the dependent libraries that used for WebLogic or database or SOA software in the container. These libraries first pulled from the repo to a buffer, then installation process happen. Better to clean this junk after installation completed.

Preferable option to use official images
When you search for any image then you will be finding many images which are publicly available. Out of the images list there could be official select that one, which is more reliable than others.

Use Dockerfile to build images

Remember that in Dockerfile every instruction line is going to create a container. Each container will be stored in the docker engine just similar to the SVN repository that have id. To build docker image by writing single RUN command with slash for separating commands for multiple commands to execute on the temporary container.

Use docker-compose instead of lengthy docker run

using docker-compose you will be saving time to write lengthy docker run commands. If you store the run command into composing file you will have more advantages you can build the docker image and also run the image as a container in a single go. You can modify the ports and other values to create more containers.

Multi-purpose of docker-compose commands

Please follow my YouTube Channel. Write your experiences/queries with the docker and docker-compose in the below give comment box. We are happy to help you in containerizing your environments.


References

Oracle WebLogic Server on Docker Containers

Friday, May 4, 2018

Ansible automation for WebLogic - Part 3 installation of WebLogic 12.2.1.3.0 quick

As part of "Ansible automation for WebLogic" series - in this post we are going to install the WebLogic 12.2.1.3.0 quick installer. There is very interesting research on how and when to use ansible modules for WebLogic. This is true weekend I set my time to have how this ansible automation works for WebLogic installation task, serious focused on this task.

Prerequisites
We have already seen in the earlier posts [if not visited yet please do visit] following links:
  1. Java Installation using ansible playbook
  2. WebLogic installer unarchive copy response file, oraInst.loc file to remote node
Writing Playbook with command
In this post, I've explored on the below mentioned best suitable ansible modules
  1. command module
  2. pause module
The command module I've choosen after trying with shell module.
Installing WebLogic is a single command that need to executed in remote node.  As we already copied the WebLogic installer and response file, oraInst.loc to /tmp folder of remote nodes, which can be used by command. To give more generic automation solution we need to use the variables in the playbook.

The pause module will pause the playbook execution. To install WebLogic it requires some time to complete the execution of the command, and we need to wait till that so pause after install command is best option to use.

Ansible playbook executes command module to install WebLogic


There are some interesting sections in the playbook that we are going to use in this post containing playbook :
  1. vars
  2. debug module
Ansible allows us to use vars with in the playbook and also we can define in separate file, then its reference file can be included in the playbook. There can be global variables which can be reusable in multiple playbooks depends on the roles that requires. We will discuss more on roles in the next post.

When some of the tasks in ansible modules are played then what happened we don't know. To get the insight on that we have debug moduleoption.  When debug module used we need to use the printing option with msg and the register variable to send the result or output to stdout. This stdout is raw string so we need to use

Ansible playbook is so simple to write as we are seeing them since two previous posts. If the playbook have multiple times same value required use vars and use them in multiple lines of a task. Here we will be using java_dir, mw_dir, mw_installer and oracle_home.

vi  wls_install.yml
---
- hosts: appservers
  remote_user: vagrant
  vars:
     java_dir: /home/vagrant/jdk1.8.0_172
     mw_dir: /tmp
     mw_installer: fmw_12.2.1.3.0_wls_quick.jar
     oracle_home: /home/vagrant/fmw
  tasks:
   - name: install WebLogic
     command: "{{ java_dir }}/bin/java -jar  {{ mw_dir }}/{{ mw_installer }} -ignoreSysPrereqs -force -novalidation ORACLE_HOME={{ oracle_home }} -responseFile {{ mw_dir }}/wls_install.rsp -invPtrLoc {{ mw_dir }}/oraInst.loc"
     register: command_result
   - debug:  msg={{ command_result.stdout.split('\n')[:-1]}}
   - name: Wait for installation complete
     pause:
        minutes: 3


The execution of WebLogic installation by playbook is simple as shown below:

vagrant@docking ~/wls-auto $ ansible-playbook -i ~/hosts wls_install.yml


Part 2 of screen shot
ansibible-playbook execution for WebLogic installation


Your valuable feedback is most important to us to improve our next articles. So request you to use the comment box.

Please write your comments and likes about this ansible series. Stay tuned to "WebLogic Tricks & Tips" for another wonderful automation soon.

Reference links
  1. debug module
  2. pause module
  3. command module

Tuesday, May 1, 2018

Ansible automation for WebLogic - Part 2: Unarchive and Copy WebLogic installers

This post is continuous learning "Ansible automation for WebLogic" series. If you are not read the previous post please go through it which will be telling you that Java installation using Ansible. That same play book you can use it for CPU patches. The objective of this post is to use the ansible playbook for unzip the WebLogic installer and run the silent mode installer. As we have explored in the last post unarchive module used for the Java installer which had tar.gz extension.  There are multiple modules in ansible which are very powerful. In this post I would like to share my experiments with the following:

  1. unarchive module
  2. copy module
Unarchive module in Ansible

We can use the unarchive module for Zip files and also for tar.gz files. When we use this module need to provide the src, dest values that is source and destination. This module automatically copies the zip file and unzip it in the remote

The copy module in Ansible
The copy module is works similar to scp in Linux it will copy the specified files in the source to destination. We can copy multiple files to remote machine with_item option. You need to provide the list of filenames that need to copy in the list.

WebLogic response file, OraInv.loc and zip file to remote boxes using ansible modules


Working in preparation of WebLogic development environments, where we need to use the WebLogic quick installer is around 230 megabytes in size. We choose this installer because which is most preferable installer for docker clusters and virtualization implementation environments or cloud environments. After download from the Oracle site, First we need to unzip the installer.

The response file
Now lets create the silent response file for WebLogic.
[ENGINE]
Response File Version=1.2.0.0.0
[GENERIC]
ORACLE_HOME=/home/vagrant/fmw
INSTALL_TYPE=WebLogic Server
DECLINE_SECURITY_UPDATES=true
SECURITY_UPDATES_VIA_MYORACLESUPPORT=false

The oraInst.loc file

inst_group=vagrant
inventory_loc=/home/vagrant/oraInventoy


Lets copy and enhancing the existing playbook file added WebLogic specific installer and silent response file, oraInv.loc files


vi wls_ins_fcp.yml
---
- hosts: appservers
  remote_user: vagrant
  tasks:
   - name: Unpack archive
     unarchive:
        src: /u01/app/software/jdk/jdk-8u172-linux-x64.tar.gz
        dest: /home/vagrant
        remote_src: yes
   - name: WebLogic Software unzip
     unarchive:
        src: /u01/app/software/FMW_wls/fmw_12.2.1.3.0_wls_quick_Disk1_1of1.zip
        dest: /tmp
   - name: Copy install script and properties
     copy:
        src: ~/wls-auto/{{ item }}
        dest: /tmp
        mode: "a+r"
     with_items:
        [wls_install.rsp,oraInst.loc]

Now run the playbook
vagrant@docking ~/wls-auto $ ansible-playbook -i ~/hosts wls_ins_fcp.yml

PLAY [appservers] **************************************************************

TASK [Gathering Facts] *********************************************************
ok: [192.168.33.102]
ok: [192.168.33.100]

TASK [Unpack archive] **********************************************************
ok: [192.168.33.102]
ok: [192.168.33.100]

TASK [WebLogic Software unzip] *************************************************
changed: [192.168.33.100]
changed: [192.168.33.102]

TASK [Copy install script and properties] **************************************
ok: [192.168.33.100] => (item=wls_install.rsp)
ok: [192.168.33.102] => (item=wls_install.rsp)
ok: [192.168.33.100] => (item=oraInst.loc)
ok: [192.168.33.102] => (item=oraInst.loc)

PLAY RECAP *********************************************************************
192.168.33.100             : ok=4    changed=1    unreachable=0    failed=0
192.168.33.102             : ok=4    changed=1    unreachable=0    failed=0

No two programs will be same each one can differently to achieve the same task. Lets confirm the execution of the above ansible playbook.
WebLogic installer, response file, oraInst.loc file into remote /tmp 


Next we will be work with the above files to install the WebLogic in remote machines using Ansible.

Expecting your feedback  in the comment section to improve ourself to give much better solutions.

References

  1. Unarchive module
  2. Copy module

Wednesday, April 25, 2018

Ansible automation for WebLogic - Part1 Java Installation

Ansible is a task execution engine. Ansible is designed to work on multiple machines to execute the batch of simple task to scale. Ansible is written in Python language, it uses Python 2.6 above is supported platform as requirement.

No Agents required!

Ansible is simple language that is started as opensource and later it is acquired by Red Hat. The core communication happens with SSH. SSH widely available trusted in all UNIX and Linux systems. Ansible can be run any system as it doesn't relay on central machine.
Ansible automation for Java and WebLogic 12c 

Here my experiment goes with two Ubuntu 14 Trusty Tahr machine. In one machine Ansible will be installed and other machine is used as target node, in real-time scenario the target list can be many hundreds and this has been proven by NASA and other Ansible implements. Using Ansible lots of organizations get into structured and role based automation implementations successful.

For Redhat flavors


The actions that need to executed in remote host machine are called TASK. playbooks are executable batches which are ymal files. Plays are having one or more tasks.   Playbooks can be collections of tasks. Plays are executed top to bottom when it parse the playbook. to work with playbook we must define inventory which we define hosts file.

Defining Inventory in hosts file
This can be placed in user home directory or common location /etc/ansible/hosts. The inventory will be defined with groups such as webapps, appservers, dbservers etc. As we are going to work on WebLogic application server we will define it as appservers group in the host inventory.

Host Inventory defining for ansible

There are many alternative options that shown in the above picture to define the host inventory. We can make grouped and un-grouped host list. Mostly grouped inventory is having more options to define the host list. we can include the list with IP address list or you can use hostnames list as well. While grouping we need to think about the task execution procedure.

Lets create a simple one our WebLogic servers host IP into the appservers as a group the file.could be stored in the $HOME path with the content as follows:

vi hosts
[appservers]
192.168.33.100
192.168.33.102


Setting up Ansible to run with SSH


ssh-keygen -t rsa -b 4096 -C "My ansible key"

ssh-keygen for vagrant user

copy the ssh key

ssh-copy-id -i ~/.ssh/id_rsa.pub vagrant@192.168.33.102


now regular Unix level command try to connect with ssh this should not prompt for password
ssh vagrant@192.168.33.10
ssh connection validation for ansible
eval $(ssh-agent)


ssh-add

lets confirm now with ansible all ssh connections are good to go for ansible play.

ansible -i ~/hosts -m ping all

ansible hosts ping all


Create your first yaml file for ansible play

The playbook is developed with yaml coding to set up couple of plays. Each play contain multiple task, which will tell the Ansible engine.

Ansible Playbook structure


Each task can be developed with module which is a part of core module and we can also create custom modules if required. There 700+ modules are freely available in opensource ansible. Here I am going to use the unarchive core module which requires src, dest values and this sample playbook have only have single play that will install Java that is unarchive the tar.gz file that is availabe in the specified shared location mentioned as src. If you don't have shared drive then ansile should use copy module and then use this task.

vagrant@docking ~/wls_auto $ cat java_install.yml
- hosts: appservers
  remote_user: vagrant
  tasks:
   - name: Unpack archive
     unarchive:
        src: /u01/app/software/jdk/jdk-8u172-linux-x64.tar.gz
        dest: /home/vagrant
        remote_src: yes


Please correct if indentation looks wrong

The execution is as follows:


We will be sharing the part 2 which will be install the WebLogic in the remote machine.

Please let me know you have any new thoughts on automation with Ansible code. This post is beginning.

References:

How to install and configure Ansible on Ubuntu?
Unarchive module sample
How to solve “Permissions 0777 for ‘~/.ssh/id_rsa’ are too open.” ?


Thursday, January 18, 2018

The docker-compose for Oracle 12c XE

Oracle Database 12.1.0.2 Express Edition


After a while got time to explore the new learning in my way. Oracle 12.1.0.2 Express edition on docker container is my goal. In this post I am going to explain you how did I achieved this with different path of using docker-compose commands to bringing up the automated XE container. The regular choice is defined in GitHub and Docker hub it was mentioned to use docker pull and docker run commands to use.

Advantages of containerizing Oracle 12c XE

  • No need to download any software from OTN
  • No need to install - dockerfile will take care of it
  • No need to run dbca for Database cration - executed moment container boot time
  • No need to start LISTENER, STARTUP database because this container choosen is AUTOMATED [OK]


Lets search for the Oracle 12c XE

docker search oracle12c

Output of docker search result
Docker Oracle 12c XE search

The docker-compose for Oracle 12c XE Database


oracle12cxe:
 image: rodrigozc/oracle12c
 ports:
  - "1521:1521"
  - "8089:8080"
  - "2222:22"


docker-compose config
networks: {}
services:
  oracle12cxe:
    image: rodrigozc/oracle12c
    network_mode: bridge
    ports:
    - 1521:1521
    - 8089:8080
    - '2222:22'
version: '2.0'
volumes: {}

docker-compose up -d
Creating oraclexe_oracle12cxe_1

Now lets check the docker-compose wit running process list
 docker-compose ps
         Name                Command       State                                  Ports
-----------------------------------------------------------------------------------------------------------------------
oraclexe_oracle12cxe_1   /entrypoint.sh    Up      0.0.0.0:1521->1521/tcp, 0.0.0.0:2222->22/tcp, 0.0.0.0:8089->8080/tcp

SSH Connection with port 2222


Using PuTTY terminal you can connect to the container that is running Oracle 12c XE database in it.

Oracle 12.2.0.1 XE docker container SSH connection

check logs what is happening in the container when it was just started...

vagrant@docking ~/oracle_xe $ docker-compose logs oracle12cxe
Attaching to oraclexe_oracle12cxe_1
oracle12cxe_1  | SSH server started. ;)
oracle12cxe_1  | ls: cannot access /u01/app/oracle/oradata: No such file or directory
oracle12cxe_1  | Database not initialized. Initializing database.
oracle12cxe_1  | Starting tnslsnr
oracle12cxe_1  | Copying database files
oracle12cxe_1  | 1% complete
oracle12cxe_1  | 3% complete
oracle12cxe_1  | 11% complete
oracle12cxe_1  | 18% complete
oracle12cxe_1  | 37% complete
oracle12cxe_1  | Creating and starting Oracle instance
oracle12cxe_1  | 40% complete
oracle12cxe_1  | 45% complete
oracle12cxe_1  | 50% complete
oracle12cxe_1  | 55% complete
oracle12cxe_1  | 56% complete
oracle12cxe_1  | 60% complete
oracle12cxe_1  | 62% complete
oracle12cxe_1  | Completing Database Creation
oracle12cxe_1  | 66% complete
oracle12cxe_1  | 70% complete
oracle12cxe_1  | 73% complete
oracle12cxe_1  | 85% complete
oracle12cxe_1  | 96% complete
oracle12cxe_1  | 100% complete
oracle12cxe_1  | Look at the log file "/u01/app/oracle/cfgtoollogs/dbca/xe/xe.log" for further details.
oracle12cxe_1  | Configuring Apex console

Here the log file shows that installation successful. And Now lets check the Expression Edition Enterprise manager console

http://192.168.33.100:8089/em

Oracle Enterprise Manager database express 12c Login page
Please enter the the login credentials as: sys/oracle select the check box as sysdba option. Because we want to do a DBA task now create user.

After login successful you will get the SYSDBA access.

Create User on Oracle 12c EM Console
Create User account as demouser 

Tablespaces for demouser

Assign privileges RESOURCE, CONNECT to demouser

Create User SQL statement processed succesfully


In the PuTTY terminal connect with oracle/welcome1 ssh credentials.
export ORACLE_HOME=/u01/app/oracle/product/12.1.0/xe
export PATH=$ORACLE_HOME/bin:$PATH

To check Oracle Database running with process that have pmon word:
 ps -ef|grep pmon
You can check for the Oracle database configured and the Listener started with entrypoint.sh script.
lsnrctl status

LSNRCTL for Linux: Version 12.1.0.2.0 - Production on 04-SEP-2017 19:16:36

Copyright (c) 1991, 2014, Oracle.  All rights reserved.

Connecting to (ADDRESS=(PROTOCOL=tcp)(HOST=)(PORT=1521))
STATUS of the LISTENER
------------------------
Alias                     LISTENER
Version                   TNSLSNR for Linux: Version 12.1.0.2.0 - Production
Start Date                04-SEP-2017 18:33:10
Uptime                    0 days 0 hr. 43 min. 26 sec
Trace Level               off
Security                  ON: Local OS Authentication
SNMP                      OFF
Listener Log File         /u01/app/oracle/diag/tnslsnr/38a4e2e216dd/listener/ale     rt/log.xml
Listening Endpoints Summary...
  (DESCRIPTION=(ADDRESS=(PROTOCOL=tcp)(HOST=38a4e2e216dd)(PORT=1521)))
  (DESCRIPTION=(ADDRESS=(PROTOCOL=tcp)(HOST=38a4e2e216dd)(PORT=8080))(Presentati     on=HTTP)(Session=RAW))
Services Summary...
Service "xe.oracle.docker" has 1 instance(s).
  Instance "xe", status READY, has 1 handler(s) for this service...
Service "xeXDB.oracle.docker" has 1 instance(s).
  Instance "xe", status READY, has 1 handler(s) for this service...
The command completed successfully

Confirm the User creation

Using SQL*Plus you can test the connection to the demouser that created in the above section.

 sqlplus demouser/welcome1@localhost:1521/"xe.oracle.docker"

Output looks like this:


connection validation using SQL*Plus

You can also define your own SID and use that for creating RCU and move further.

Please share your feedback on this experiment how it helps you and any suggestions to improve more posts on containerization in Oracle DevOps.

References:

Git Hub link for Oracle 12c+ SSH 
Docker hub link of Rodrigozc

Blurb about this blog

Blurb about this blog

Essential Middleware Administration takes in-depth look at the fundamental relationship between Middleware and Operating Environment such as Solaris or Linux, HP-UX. Scope of this blog is associated with beginner or an experienced Middleware Team members, Middleware developer, Middleware Architects, you will be able to apply any of these automation scripts which are takeaways, because they are generalized it is like ready to use. Most of the experimented scripts are implemented in production environments.
You have any ideas for Contributing to a Middleware Admin? mail to me wlatechtrainer@gmail.com
QK7QN6U9ZST6